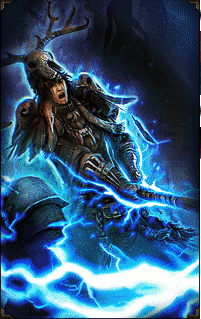
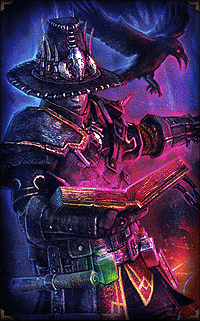
Sir BloodyDots Vitality Bleed Conjurer

by requnix

Shaman + Occultist = Conjurer

Faction of Choice: Order of Death’s Vigil

Gameplay

Once you get Grasping Vines and Devouring Swarm up, this build levels very quickly. There can be energy management issues in the beginning (just throw Ectoplasm in your jewelry), but with Grasping Vines being your main damage during leveling, you just need to strategically place and cast it every few seconds (at most) because all of the mobs that run into it will get shred to pieces. Curse tougher mobs and even RR them with Devouring Swarm. You can also add Bloody Pox on top of all that, but most trash dies long before you have the chance to stack the damage. The Vitality Storm Totem also provide great leech support, and if you need it, Wendigo Totem and Blood of Dreeg are at your disposal. It’s great to cast Grasping Vines once and kill the entire screen full of trash. For bosses, you can whack on them with Savagery to cause additional weapon and bleeding damage.

The General Play Technique focuses on Grasping Vines as your main damage dealer. It alone will often kill most trash (and it has a VERY large AoE). For tougher trash, just Grasping Vines and Curse of Frailty. Rarely will you need to do more than this, but some trash in Ultimate (when you get to AoM or bleed/vitality resistant mobs) can require a 3rd cast of Bloody Pox (which procs Wendigo’s Mark), which spreads beautifully through a large group. Mobs rarely even reach you as they die of gushing wounds running through your AoE damage.

It’s important to mention that the damage from Grasping Vines stacks, so be sure to keep those 3 stacks up on tough targets whenever you can!

Survival is all about killing most targets from a distance and if necessary setting up the Vitality Leech paired with the regeneration of Blood of Dreeg (which should always be active) and healing of Wendigo Totem. But the great thing is we can get up close and personal with Savagery, which also increases our leech and health regeneration. The build can actually be quite tanky with the right gear and leech damage, but some bosses just hit too hard and you’ll have to kite them – but a DoT build is perfectly built for this gameplay style.

Rotation for Trash Blood of Dreeg always up. Grasping Vines on the edge of the group you want to shred, and they’ll die running to you. For tougher trash, add Curse of Frailty and Bloody Pox on top of that. They’ll never reach you.

Rotation for Bosses Blood of Dreeg always up. Grasping Vines on the target, Curse of Frailty, Devouring Swarm, Bloody Pox, and lay down your Storm Totem, Wendigo Totem and then BEAT THEM MERCILESSLY WITH Savagery! Cycle through the same as cooldowns are made available. The goal is to keep all DoTs, Devotions, CC and RR on the boss at all times while you whack them over the head. Most bosses can be facetanked with Blood of Dreeg, Wendigo Totem (with the leech of Devouring Swarm and Storm Totem) and Savagery, but when you need to kite, just follow the above and .. RUN! Cast behind you and try to loop around to keep the boss in the Grasping Vines field as long as possible. You can also whack them twice and run away. Some bosses will stun you as they rush; these are the most dangerous (for any build) and can be mitigated with stun resistance. For really tough bosses, make sure you get your armor absorption as high as possible (90% or higher recommended) so you can take the hits better.

Items

This build utilizes bonuses from two sets: the first is the Wildblood set (3 items: 2H Mace, Shoulders and Belt). This set focuses on enhancing Grasping Vines and provides both Vitality and Bleed damage. The second is the Valguur set, which provides more Vitality and Bleed damage with Storm Totem support. The good news is there are plenty of green and blue drops that focus on Vitality and Bleed damage during leveling, and the Wildblood set is very common (I believe Valguur is more rare to find).

Remember: With the Kraken devotion providing great damage enhancement, and using Savagery to whack on bosses, we always want to be using a 2H weapon!

While leveling, you’ll find these items to be very helpful:

Required Level Item Note
25 Gluttony Relic
35 Torment Relic
40 Gargoyle Vistage Helm
50 Sacrifice Relic
50 Empowered Revenant’s Edge 2H
50 Wendigomane Leggings Legs
50 The Guillotine 2H
58 Bloodfury Spaulders Shoulders
58 Boneweave Girdle Waist
58 Thorn Girdle of the Misty Glade Waist
58 Deathlord’s Band Ring
58 Mark of the Forbidden Amulet
65 Empowered Locust Gem Amulet
65 Wendigo Dread Mask Helm
70 Solael’s Decimation Relic

Preferred Items

Slot Item Component Augment
Weapon Mythical Wildblood Crusher Seal of Blades Potent Ravager's Eye
Head Valguur's Gems Sacred Plating Mankind's Vigil
Shoulders Mythical Wildblood Mantle Sacred Plating Mankind's Vigil
Chest Valguur's Raiment Sanctified Bone Dreeg's Omen
Hands Dark One's Grasp Ugdenbog Leather Coven Black Ash
Belt Mythical Wildblood Girdle Ugdenbog Leather Coven Black Ash
Legs Mythical Chausses of Barbaros Scaled Hide Wendigo Soulscent Powder
Feet Mythical Boneshatter Treads Ugdenbog Leather Mankind's Vigil
Amulet Bloodsurge Seal of Annihilation Osyr's Temper
Ring Mythical Cursebearer Bloodied Crystal Osyr's Temper
Ring Thunderstruck Cronley's Signet of Readiness Bloodied Crystal Osyr's Temper
Medal Mythical Mark of the Forbidden Tainted Heart Rune of Displacement
Relic Solael's Decimation - -

Leveling Guide

The following list shows a possible way to level a character up.

Phase 1

You should be about lv26 at this stage.

Note: You can pursue Phase 3 at this point if you want to get Savagery and its supportive skills before pursuing Possession, but the build performs just fine at this point without it, and rushing Possession is important. If you are having single-target damage problems (due to self-found items) go ahead and take Phase 3 before Phase 2 and start beating on bosses.

Phase 2

  • Choose class Occultist
  • 1 point into bar (Occultist 1/50)
  • 1 point into Curse of Frailty (1/10)
  • 4 points into Entangling Vines (10/12)
  • 10 points into Devouring Swarm (16/16)
  • 4 points into bar (Occultist 5/50)
  • 1 point into Bloody Pox (1/12)
  • 1 point into Solael’s Witchfire (1/12)
  • 5 points into bar (Occultist 10/50)
  • 4 points into Vulnerability (4/10)
  • 5 points into bar (Occultist 15/50)
  • 1 point into Blood of Dreeg (1/16)
  • 5 points into bar (Occultist 20/50)
  • 6 points into Wasting (6/12)
  • 5 points into bar (Occultist 25/50)
  • 1 point into Second Rite (1/12)
  • 7 points into bar (Occultist 32/50)
  • 1 point inot Aspect of the Guardian (1/12)
  • 18 points into bar (Occultist 50/50)
  • 12 points into Possession (12/12)

Phase 3

  • 1 point into Savagery (1/16)
  • 3 points into Might of the Bear (3/3)
  • 1 point into Brute Force (1/12)
  • 3 points inot Feral Hunger (3/10)
  • 6 points into Tenacity of the Boar (6/12)
  • 1 point into Storm Touched (1/12)

Phase 4

  • 6 points into Heart of the Wild (7/10)
  • 15 spoints into Blood of Dreeg (16/16)
  • 6 points into Curse of Frailty (7/10)
  • 6 points into Vulnerability (10/10)
  • 11 points into Second Rite (12/12)
  • 9 points into Aspect of the Guardian (10/12)
  • 4 points into Wasting (10/12)
  • 10 points into Storm Totem (16/16)
  • 3 points into Grasping Vines (12/12)

Devotions

  • Crossroads (Eldrich, 7 o'clock)
  • Scholar’s Light (The cancle 3 below the center)
  • Crossroads (Primordial, 12 o'clock)
  • Eel (above and 3 to the right from the center)
  • Kraken (3 above and to the left on the center)
  • Jackal (The "dragon head", 2 left and a bit above the center)
  • Wendigo's Mark add Bloody Pox (the kneeling figure, 5 left of the center)
  • Crossroads (Chaos, 10 o'clock)
  • Revenant add Devouring Swarm (the grim reaper, above Wendigo)
  • Crossroads (Order, 2 o'clock)
  • Panther (1 above the Eel)
  • Solemn Watcher (1 right to the Panther)
  • Dying God add Curse of Frailty [PARTIAL] (Fallen over figure, right of the Revenant, grim reaper)
  • Lotus (Flower between Panther and Solemn Watcher, Tower)
  • Hawk (Right of the Scholar’s Light, candle)
  • Remove all from Crossroads
  • Rattosh, the Veilwarden add Grasping Vines ("Poseidon", center in the bottom)
  • 1 Point into Bat (15% Vit/Bleed Damage) OR Ultos (OA)